Plumbing 101: Solvent Welds
It’s about more than just grabbing whatever color is on the shelf—not all pipe cement is created equal.
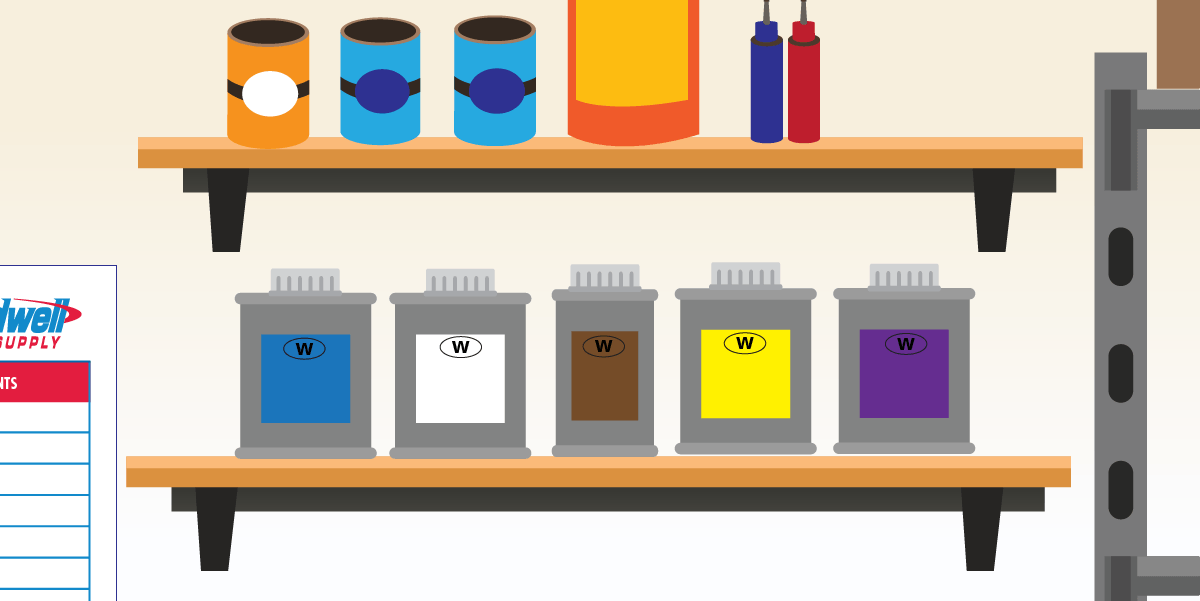
Pipe cement is a preferred method to fix and join pipe in many multifamily situations. Without a doubt, the most popular type is the fast one-step cement. It combines the primer and the cement into one application.
However, before you go grab the blue, yellow, purple, or clear can off the shelf, you need to know that not all cement is created equal. Using the wrong cement for the job will eventually lead to joint failure (and a mess).
When selecting what cement to use, check that it works for the:
- Pipe Material (PVC, CPVC, ABS, etc.)
- Pipe diameter and pressure/thickness
- Application condition (pressures, material, etc.)
Once you have the right cement for the job, follow these easy 8 steps for success when using 1-step PVC #207254 or CPVC #207132 Cement.
- Cut the pipe squarely, using pipe cutter or proper saw.
Why? Uneven cuts can reduce joint strength. - Deburr and chamfer (bevel) the pipe.
Why? Ragged edges and sharp corners on the pipe end can scrape the cement and softened surface of the socket, creating a weaker and possibly leaky joint. - Use a clean, dry rag to remove loose dirt and moisture from the fitting and pipe.
Why? If contaminated with grease, inks or oils the solvent may not form a proper bond.
- Test fit pipe—place pipe 1/3 to 2/3 of the way into the fitting (do not force it). Mark any alignment points.
Why? If it is too loose or tight, then it may not weld properly. - Application of the Cement:
Apply a liberal coat to the outside of the pipe to the depth of the socket
Apply a thin coat of cement to the inside of the fitting; avoid puddling of cement.
Why? Puddling can cause premature failure of pipe or fitting.
Apply a second coat of cement to the outside of the pipe. - While cement is wet, push pipe FULLY into fitting using a ¼ turning motion to distribute cement until pipe bottoms.
Note: If the cement has dried, recoat both parts before assembling. - Hold pipe and fitting together for 30 seconds to prevent pipe push-out, longer at low temperatures.
- Check for a bead of evenly applied cement around the entire perimeter of the joint and wipe off excess.
NOTE: Set up/cure time is dependent on many factors such as pipe size, temperature, humidity, cement type, etc. These should be considered when determining cure times. If using a 2-step cement, clean pipe and fitting with the correct primer prior to step 5.
IMPORTANT: Always follow the manufacturer’s instructions for the product and use proper PPE for eye and hand protection.